If you're looking for a way to spice up your website or app with a slider login register form, you've come to the right place. In this post, I will share with you how to create this awesome feature in just 5 minutes. You don't need any advanced skills or tools to follow along with me. Let's get started.
In this tutorial, you will learn how to build a beautiful HTML CSS slider login register in 5 minutes. A slider login register is a user interface element that allows users to switch between login and register forms by sliding the screen horizontally. This can create a smooth and elegant user experience for your website or application. You will use HTML to create the structure of the slider, CSS to style and animate the slider, and JavaScript to add interactivity and functionality to the slider. By following this tutorial, you will be able to create a responsive and modern slider login register that works on different devices and screen sizes.
👉 Here is full source code: link download (click into Free Access to download it)
You'll Love My Other Channel with More Fun and Useful Tips
👉 Youtube Learn Tech Tips👉 Tiktok
👉 Facebook:
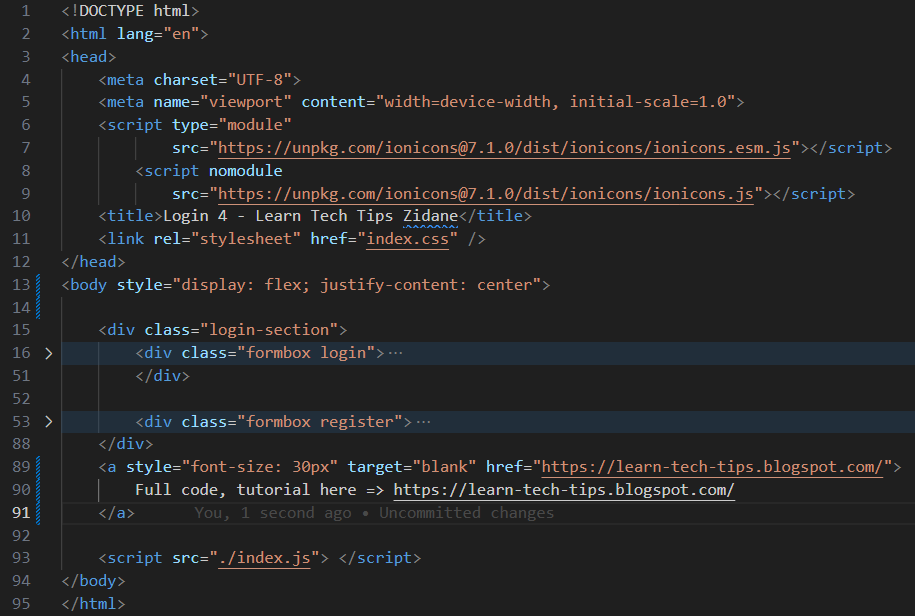
First I will introduce rhe Material I am using on this website is Ionicons, you can import library from this site
<script type="module" src="https://unpkg.com/ionicons@7.1.0/dist/ionicons/ionicons.esm.js"></script>
<script nomodule src="https://unpkg.com/ionicons@7.1.0/dist/ionicons/ionicons.js"></script>
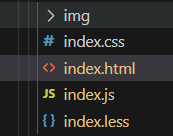
Here is my full structure of website
HTML file
On the class="formbox login" we will have two input email, password, one checkbox remember me, one button LogIn and one link is Sign up
<div class="formbox login">
<form>
<h2> Sign In </h2>
<div class="input-box">
<span class="icon">
<ion-icon name="mail-outline"></ion-icon>
</span>
<input type="email" id="email" required/>
<label for="email"> Email</label>
</div>
<div class="input-box">
<span class="icon">
<ion-icon name="logo-pwa"></ion-icon>
</span>
<input id="password" type="password" required />
<label for="password"> Password</label>
</div>
<div class="remember-password">
<label>
<input type="checkbox" name="" id="Remember Me" />
Remember Me
</label>
<a href="#"> Forgot password</a>
</div>
<button class="btn"> Log In </button>
<div class="create-account">
<p> Create An account?
<a href="#" class="register-link"> Sign Up </a>
</p>
</div>
</form>
</div>
On the class="formbox register" we will have three input email, password, confirm password (this fields all required) , one button LogIn and one link is Sign In for swap between login and register from. So we will give a class name on this link is "login-link" for use later
<div class="formbox register">
<form action="">
<h2> Sign Up </h2>
<div class="input-box">
<span class="icon">
<ion-icon name="mail-outline"></ion-icon>
</span>
<input type="email" id="emailr" required/>
<label for="emailr"> Email</label>
</div>
<div class="input-box">
<span class="icon">
<ion-icon name="logo-pwa"></ion-icon>
</span>
<input type="password" id="passwordr" required />
<label for="passwordr"> Password</label>
</div>
<div class="input-box">
<span class="icon">
<ion-icon name="logo-pwa"></ion-icon>
</span>
<input type="password" id="confirmpassword" required />
<label for="confirmpassword"> Confirm Password</label>
</div>
<button class="btn"> Sign Up </button>
<div class="create-account">
<p> Already have an account?
<a href="#" class="login-link"> Sign In </a>
</p>
</div>
</form>
</div>
Here I will summary some main point
Added the background to your HTML, you can use background url, background-position: center for center the background on your view site. background-size: cover, and the min-height is 100vh for full height on your view
body {background: url('./img/bg.jpg');
background-position: center;
background-size: cover;
min-height: 100vh;
width: 100%;
}
For the animation when click into label email, password, we will see the label will float on top,
input {
...
&:focus ~ label,
&:valid ~ label {
top: -10px;
}
}
label {
transform: translateY(-50%);
transition: 0.3s ease-out;
}
If you want to have a red color on checkbox when you check on it, you can use accent-color style
.remember-password {
...
label {
input {
accent-color: red;
}
}
}
For the click swap between your side Login and Register, you will have 2 file, one is javascript, and the css to do it
Javascript file you need to get the login section, get the login link, register link from document.querySelector, then you will be add Event Listener on click login and register link (just simple add active and remove active class on two section)
When login active will show login page, and register active will show the register page
registerLink.addEventListener('click', () => {
login.classList.add('active');
})
loginLink.addEventListener('click', () => {
login.classList.remove('active');
})
On CSS you will use transform: translateY to above or bottom current view (login-section), we use transition: transform 0.6s ease for smooth the animation.
first the login will show on currently place, so
&.login {
transform: translateY(0px);
transition: transform .6s ease;
}
And the register need to hide
&.register {
transform: translateY(-460px);
transition: transform .6s ease;
}
I move this section on above -460px (and use over-flow:hidden on login-section hide it)
when login active I will transform this login from 0 -> 460px position same this, use transition-delay: 0.7s for a delay time if you dont want delay, and want to immediately move so no need to use this style
&.active {
.formbox {
&.login {
transform: translateY(460px);
transition-delay: 0.7s;
}
}
}
.login-section {
transition: .3s;
overflow: hidden;
.formbox {
// logic:
// 1/ first position, register hidden on above
&.register {
transform: translateY(-460px);
transition: transform .6s ease;
}
&.login {
transform: translateY(0px);
transition: transform .6s ease;
}
}
&.active {
.formbox {
// 2/ when register active
// login on bottom 460px (hide) Overflow: hidden
&.register {
transform: translateY(0);
transition-delay: 0.7s;
}
&.login {
transform: translateY(460px);
transition-delay: 0.7s;
}
}
}
}
And here is full video tutorial here
@learntechtips How to build a beautiful slider Login register form in 5 minutes#learntechtipszidane #css #loginform #html ♬ original sound - Learn Tech Tips in 60s


